Cleaning Brass
Cleaning brass is one of the most important restoration topics to discuss because too many people don't understand the proper way to work with brass and end up ruining the instrument either by over-polishing or using something abrasive like sandpaper, steel wool, or a Dremel Tool wire wheel on the instrument.
As I mentioned in the introductory page, some people prefer to polish dirty brass keys to make them shine like new; however, I am against this method. I like instruments that look their age. Nothing is nicer than an ancient telegraph key with the "old penny" look to it. Just because your newly acquired instrument is covered in dirt and oxidation doesn't mean you can't restore that look. It just takes a lot of patience and attention to detail, hence the need for working under a stereo microscope.
Whether you prefer the polished look or the "old penny" look, above all else.....PLEASE do not use anything abrasive on the brass ! No steel wool, no sandpaper, no wire wheels. You will scratch the brass and ruin the finish. Only use abrasives on steel parts !
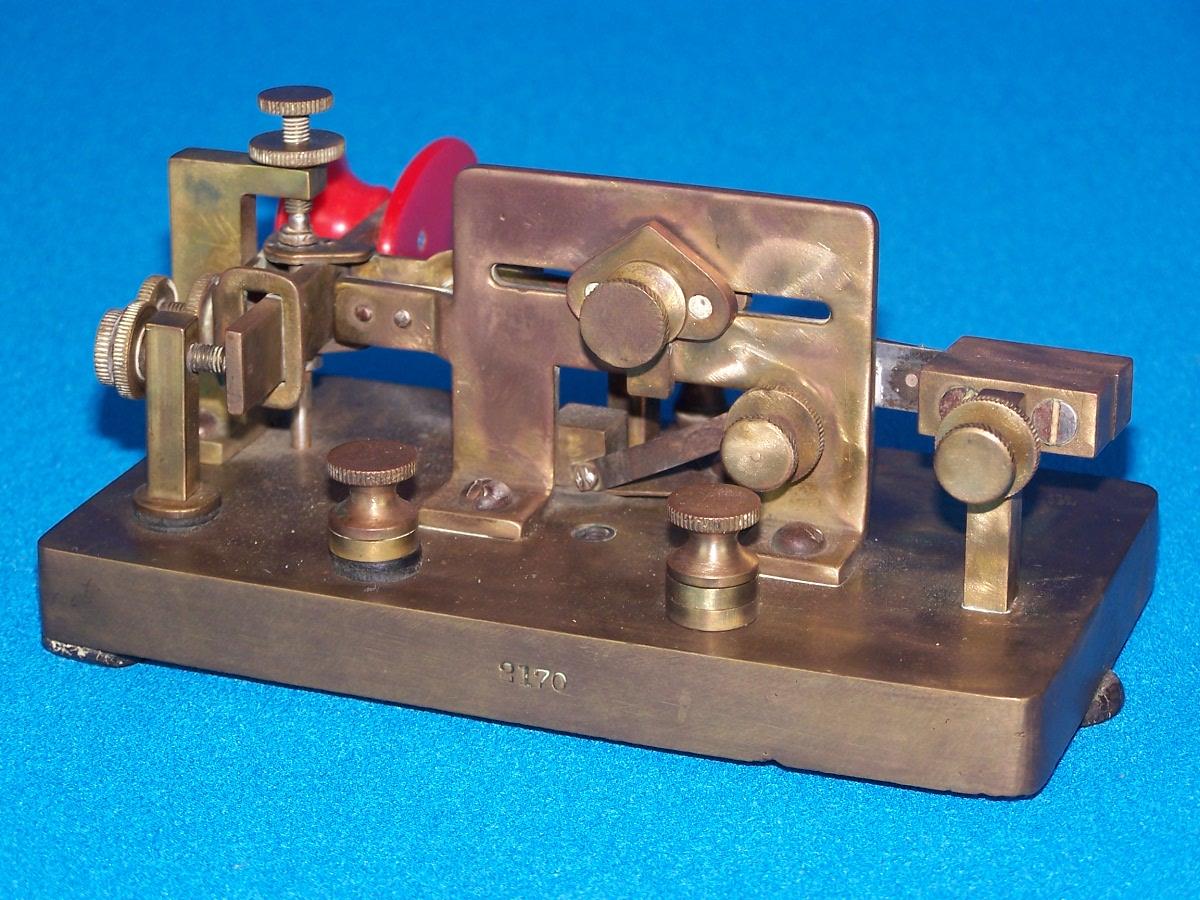
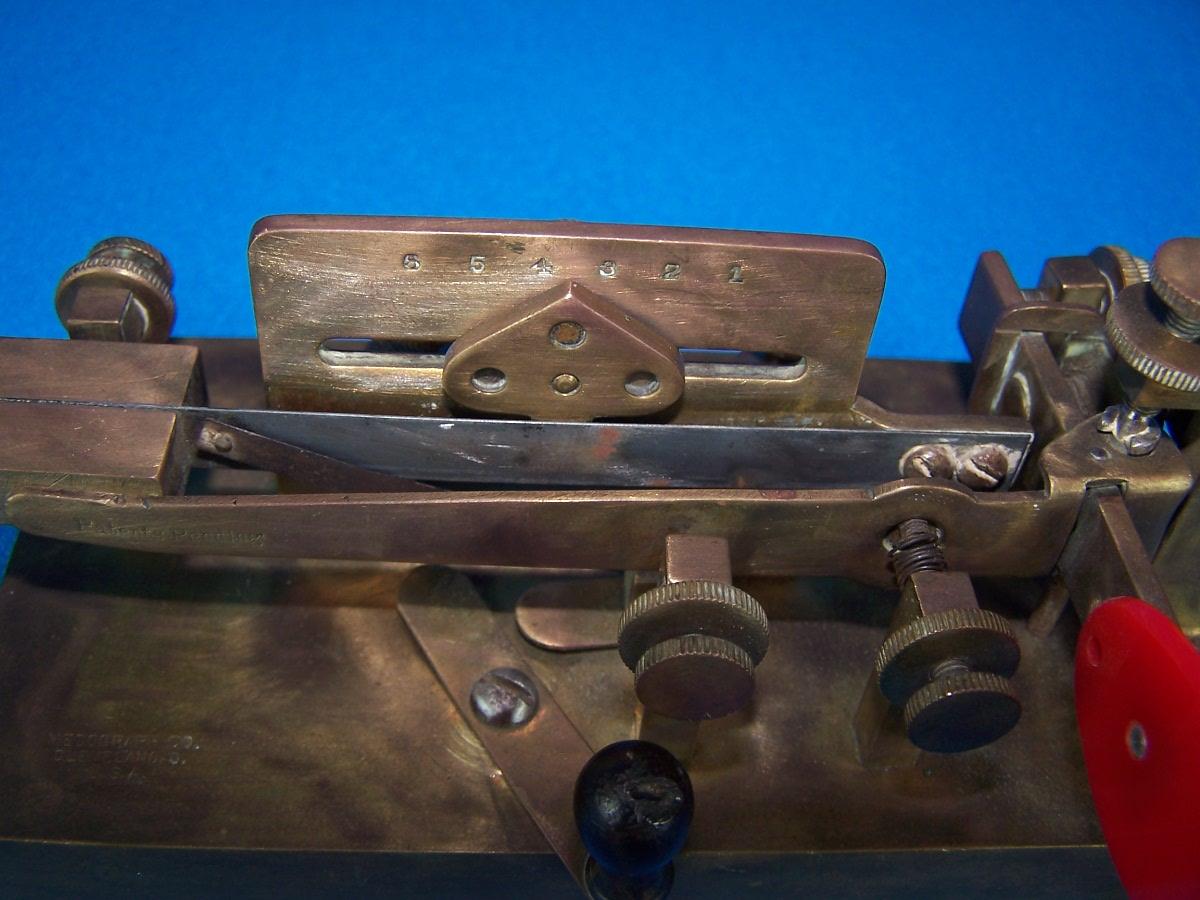
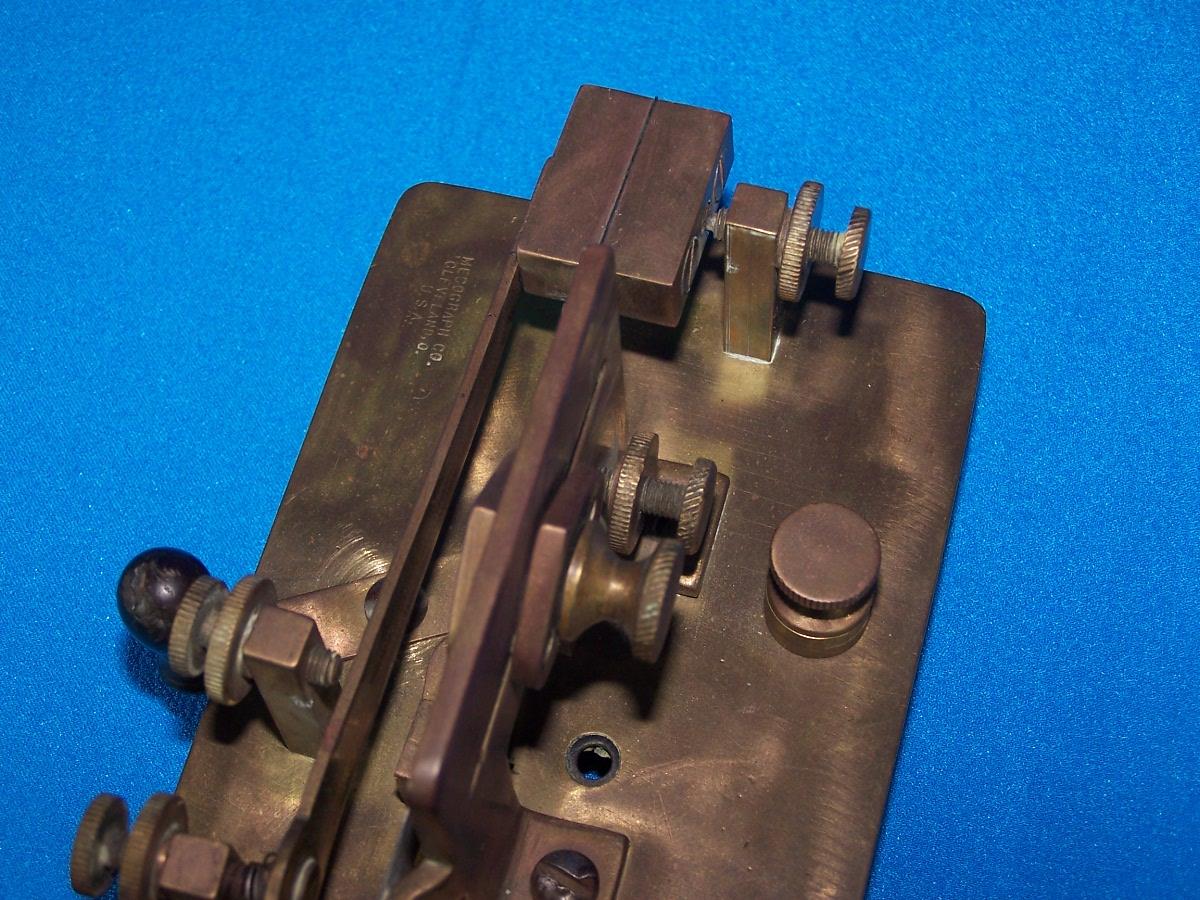
**The only exceptions to this rule are if you have a key where the brass is pitted from corrosion or if you have a key like the Mecograph pictured below that was damaged with a wire wheel, leaving micro scratches on the brass. The only way to restore the brass is to use super fine Emery Cloth, starting with 600 Grit and finishing with 1200 Grit.
If you don't believe me, here is an example of a brass Mecograph Model 3 bug that someone used a wire wheel to clean. Notice the dull, hazy finish and if you look closely you can see that the key is covered with thousands of micro-scratches. This key has been ruined by someone with no patience.
 |
 |
 |
A telegraph key with nice even patina is a beautiful thing to see; however, when a collector finds an old brass key with a nice patina, it usually also has some undesired substances attached to it, such as dust, dirt, grease, or green oxide crystals. Dust can be removed simply by wiping or scrubbing with soap and water but these other substances must be removed by other means.
Naval Jelly will surely remove these substances, but at the same time it will completely remove the patina on the brass, which is what you are trying to avoid.
My cleaning method involves physically scraping the crud from the surface of the brass using a Scraping Tool, a DULL X-Acto knife. The "dull" part is very important because a sharp blade has a greater potential to scratch the surface, creating a shiny spot. A dull blade lets you remove the nasty stuff without scratching the metal. You will be left with a nicely patinated key. It takes some practice, but once you get the hang of it, it's actually quite easy.
Step 1. Prepare a Scraping Tool:
If you take out a brand new X-Acto blade, you will see that it is razor sharp. You don't want to use such a blade on your brass as it will surely scratch the metal. So you have 2 options: You can find a used blade that has already been slightly dulled, or you can prepare a new one from scratch (no pun intended).
What I like to do is take a blade, put it in the knife, and run it across a piece of scrap brass a few hundred times. It takes awhile, but it's something you can do while watching TV. Use the knife to cut into the brass with the blade perpendicular to the surface of the brass. You should also scrape the blade across the surface at an angle in both directions. This will help round the sharp edges of the blade enough to prevent it from scratching your key. Don't be surprised if the very tip of the blade breaks off while performing this operation. This is actually a good thing, as it's preferable to have the tip rounded as well.
 |
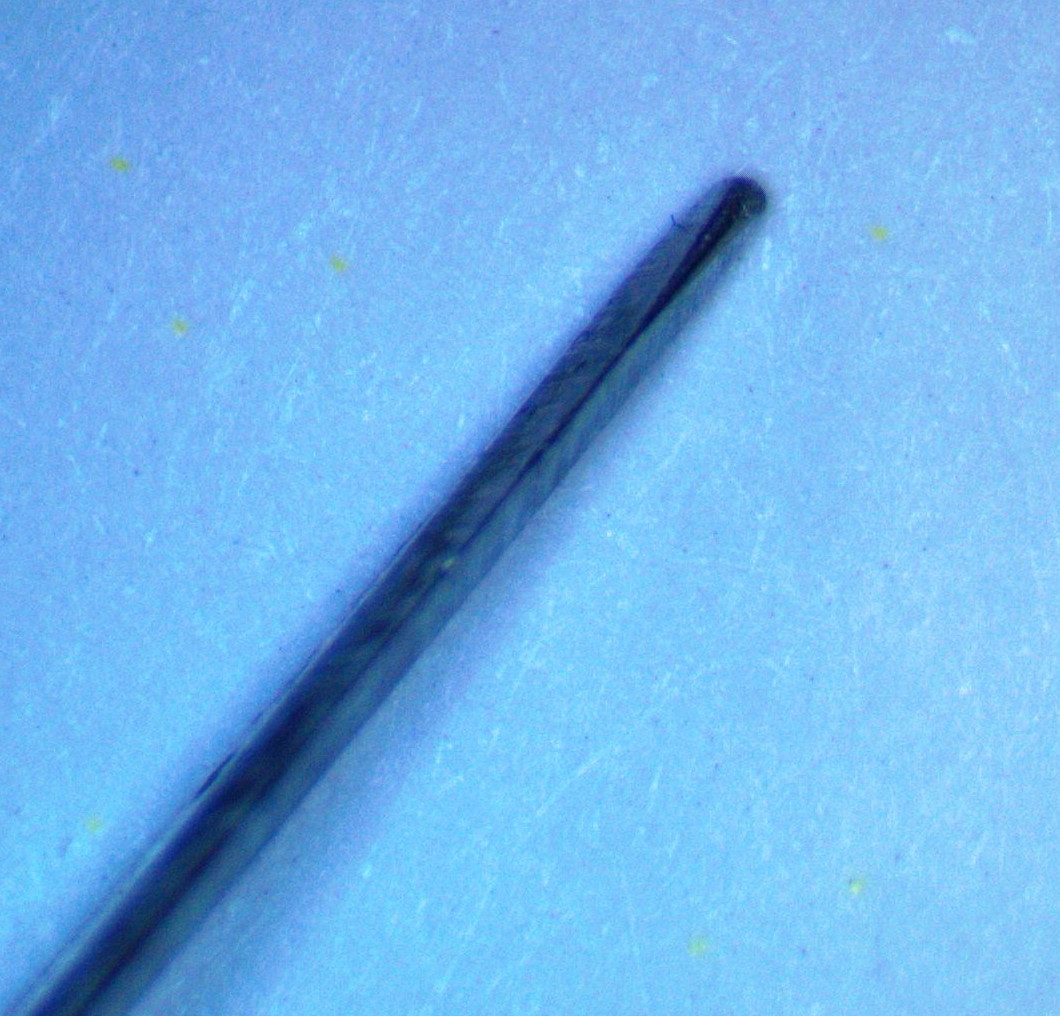 |
An example of a properly dulled X-Acto blade as viewed under a microscope. Note how the tip of the blade is rounded rather than razor sharp. This allows the blade to scrape off dirt and oxides without scratching the brass. |
 |
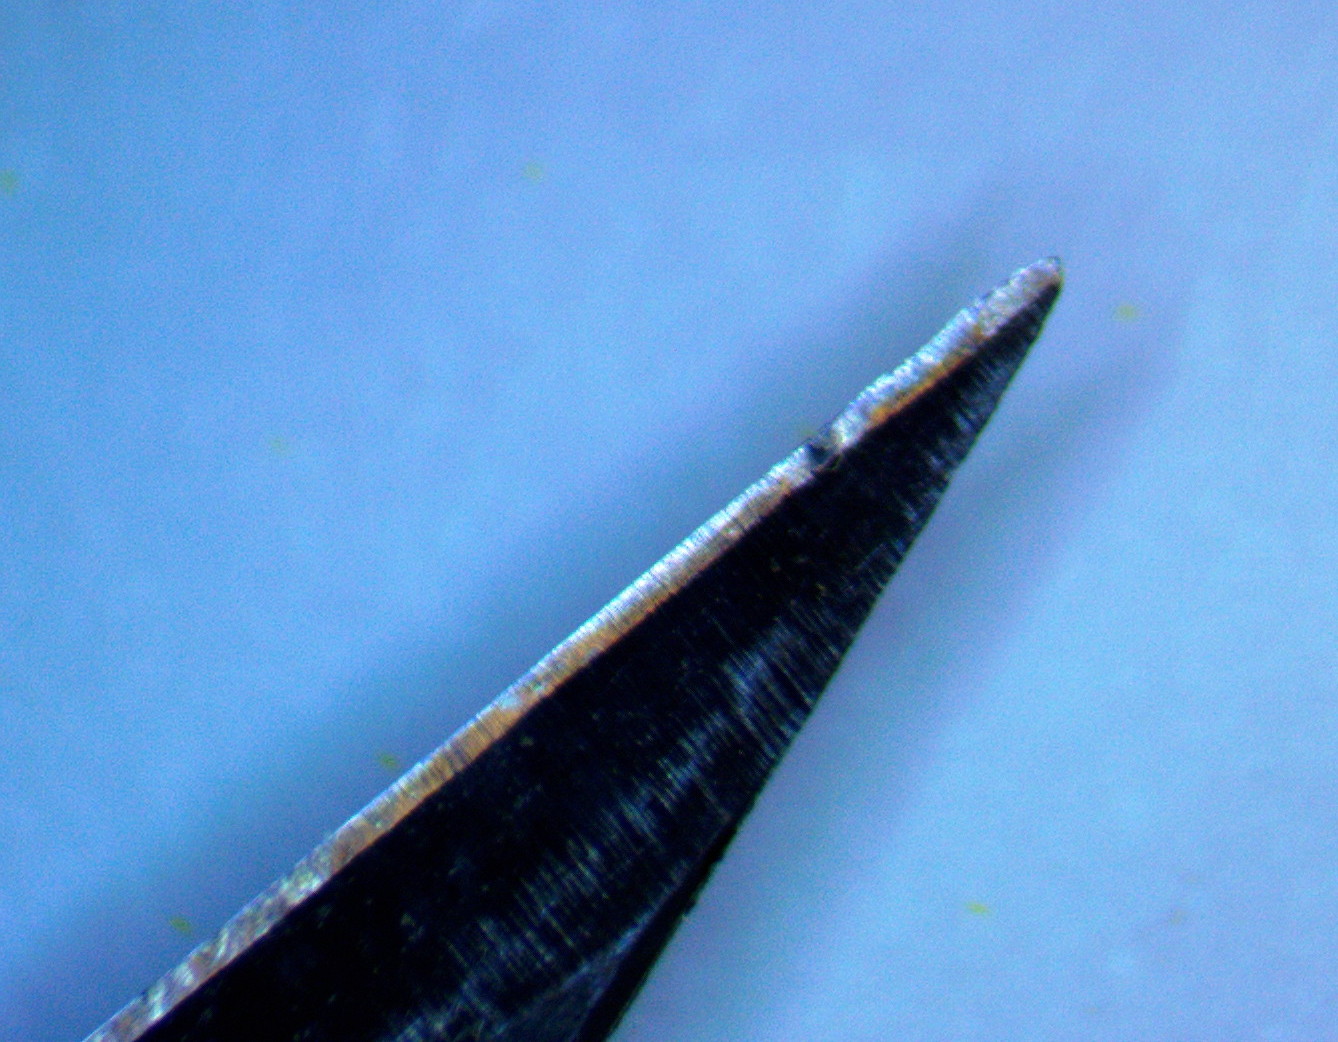 |
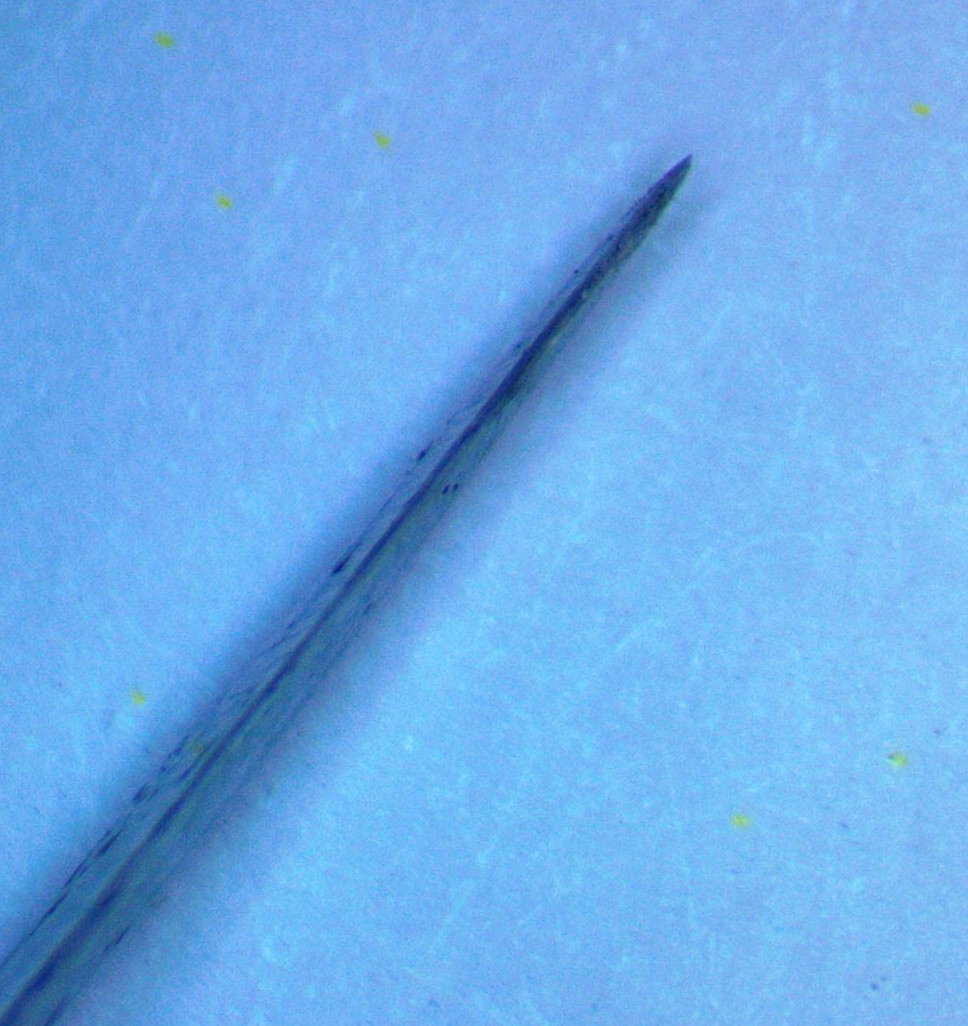
This is an example of a typical sharp X-Acto blade. It has been used some, but still very sharp. Using such a blade on your brass key will surely result in scratching. |
Step 2. Scrape off the crud:
Before attempting to use this scraping process on your valuable telegraph instrument, I recommend practicing on a "junker" key that you don't care about damaging. If necessary, buy one on Ebay. The junkier it is, the cheaper it will be, but this will also give you the best material for practice.
Working under a stereo microscope at 8x, position the brass piece so you have a dirty area in the middle of the viewfinder. Hold the X-Acto knife blade at a low angle to the brass, press the end of the blade against the brass and begin to gently scrape back and forth across the surface of the dirt. All of the scraping will be done by the very front of the blade, within 1/16" of the tip. As you progress, you will see the dirty areas become flatter until they are even with the surface of the brass. There still may be a dark spot in the area you were scraping, darker than the surrounding brass, but this is normal. Don't expect to remove this discoloration. It is now part of the brass, but that's what gives it the great "aged" look. The point is, you have removed the surface contaminants, and prevented them from further damaging the finish on your instrument.
I made this video showing an actual brass key lever being cleaning with an X-Acto knife. (Please allow time for the video to load before viewing)
Depending on the type of contaminant, you might have to apply more force to your scraping, or increase the angle of the blade in relation to the brass surface. The green crystalline oxide deposits tend to be the toughest to remove, as they are more corrosive and tend to eat into the brass. But with practice you will become an expert at removing undesired residues from brass.
Sometimes the piece of brass you are cleaning will have some tiny dents or pre-existing scratches which leave raised areas around the dent or scratch. So, when you are scraping the brass with your knife, it is quite likely that you will scratch those raised areas, which results in a shiny scratch. Or, you might accidentally use a little more force than you wanted on a spot, also causing a shiny scratch. Don't panic, these are easy to fix.
Get your bottle of Brass Black and dip the end of a toothpick in the solution. Then while looking at the scratch under your microscope, wipe the tip of the toothpick on the scratch. Wait a few seconds then wipe it off with a tissue. The shiny scratch will disappear !
![]()
![]()