Repairing Broken Sounder Coils
The coils used on telegraph sounders, relays, and registers are each made of a single long piece of copper wire wound around an iron core, forming an electromagnet. When current passes through the coil, it produces a magnetic field which is used to pull down on a steel armature attached to the lever.
 |
Here are 2 typical sounder coils viewed from underneath. Note that one end of the wire is close to the iron core (the inner part of the winding) and the other end is near the outer edge. |
Sometimes due to mishandling of the instrument, especially if the instrument is taken apart, the delicate sounder wires can be bent or flexed excessively, causing the wire to break. A broken wire can be repaired, but depending on where the break occurs, it can be a very simple or a very very difficult repair !
If the wire breaks somewhere away from the body of the coil, consider yourself fortunate because repairing the wire is as simple as soldering the ends back together with a slight overlap. (Hint: Before soldering treat each end with Naval Jelly first then rinse and shine the ends with steel wool to remove patina that could prevent the wires from soldering properly).
However, more often it seems that the wire will break off right at the point it enters the small hole in the underside of the sounder. I think this happens because the hole provides a sharp pivot point for the wire that can allow it to bent at a sharper angle, thus increasing the likelihood of snapping at that point.
If the wire breaks at the hole near the outer edge of the coil, this is still not that bad. What you will need to do is remove the hard rubber cylindrical coil cover to access the broken wire. These coil covers can be a bit tricky to remove. They are supposed to simply slide off vertically but sometimes they can get stuck, and you have to push, pull, press, wiggle, and tease it off. Eventually you should be able to get it off and then you can see the wires.
If it was the outer wire that broke, it should be right there on the top layer of the windings. All you have to do now is unwind a couple turns of the wire then feed it back through the outer hole. Then replace the coil cover and re-connect the wire.
However, if the coil broke right at the innermost hole near the iron core, this is the worst case scenario. If you are lucky, and there is still a tiny bit of wire poking through, sometimes you can get a pair of needle-nose pliers, grab the tip of the wire, and pull it out just enough so that you can solder another wire to it.
Of course, Murphy's Law dictates that the broken wire end will be far up inside the hole so you can't see it. So now your only option is to remove the coil cover and completely unwind the coil. I like to do this in an area like the living room where you can spread things out. If you have a dining room table with a table cloth, you can wind the wire around the edge of the table as you unwrap it. The reason for spreading it out is to avoid kinking the wire which can cause it to break.
Before you start to unwind the wire, make a note of which direction the wire is wound because it dictates the polarity of the electromagnet (the North-South poles). Be sure to re-wind it in the same direction. Once it is completely unwrapped you might notice that the iron core has a paper wrapping on it. Sometimes this wrapping is made from a newspaper or some other advertisement of the day, which could have some interesting stuff printed on it, since it might be over 100 years old !
Now begin the long process of re-winding the coil. Insert one end of the wire through the hole nearest the iron core through the inside of the coil. Leave about 4 inches of wire protruding out the bottom. As you wind the coil, keep constant tension in the wire so it does not unwind itself. Start winding from the bottom. Wind 3 turns, then use your fingernail to press the wires tightly against each other to ensure you have a nice evenly wound coil. When you reach the top, start winding towards the bottom on top of the first layer of wires. When the reach the bottom of that winding, start upwards again, always stopping every 3 turns to use your fingernail to press the winding close together.
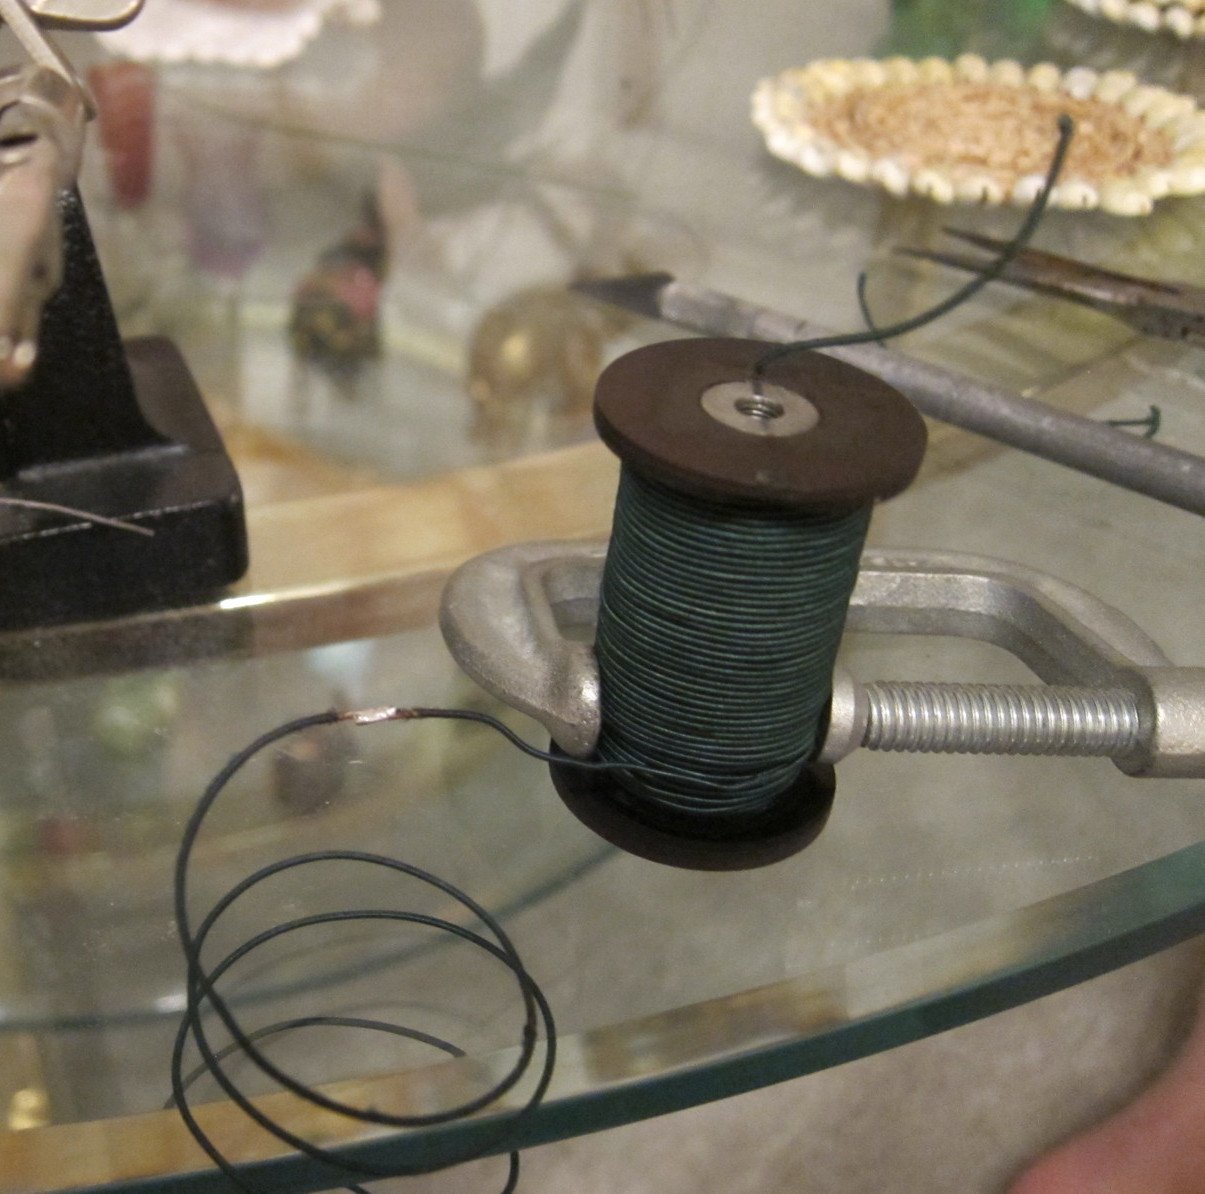
After awhile you will probably find yourself getting tired (or bored), so you can apply a C-clamp to the windings to hold them in place while you take a break. (see pictures below). When you reach the end of the wire, save about 8-10 inches and feed the end through the outermost hole. Replace the hard rubber coil cover and you are finished.
On some early sounders, the wire coming out of the outer hole is then wound in a tight spiral for about 1/2" or so. If yours is like this, you can replicate this by winding the wire around a small drill bit before soldering the end back to the binding post. Congratulations, you have just re-wound an electromagnet !
 |
 |
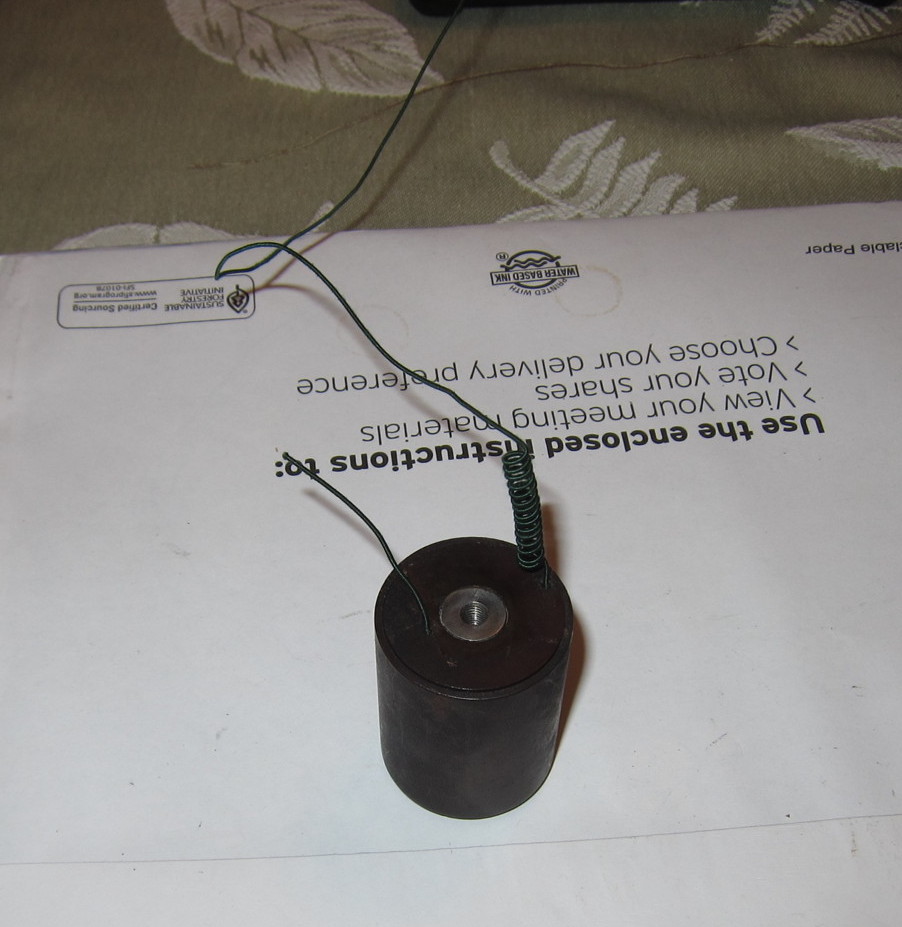 |
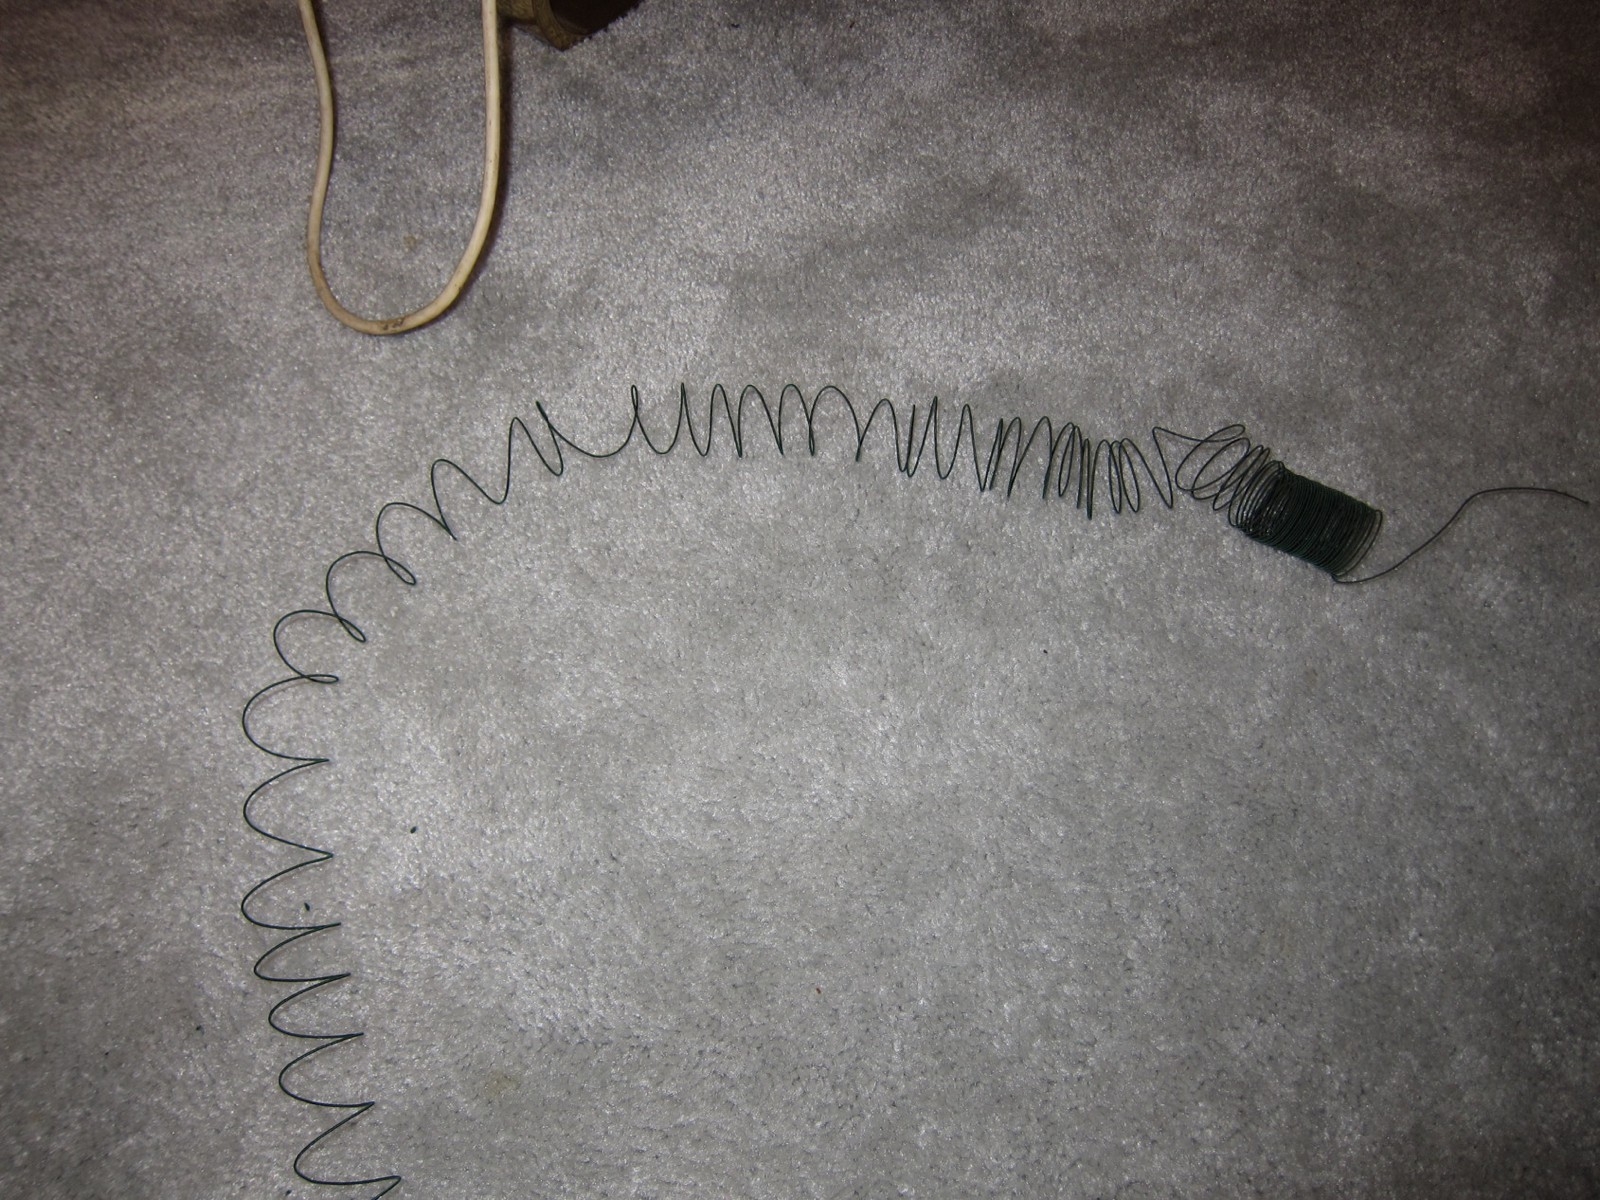
| The coil after unwinding. This just shows the end. There is a LOT more wire not visible in the picture ! | The coil after several layers are re-wound. Taking a break at this point and using a C-Clamp to keep the wires in place. This coil had a kink in the wire which broke, so I had to solder splice the ends together. | The finished coil. Leave a few inches on the inner end and 12+ inches on the outer end to make a spiral (if needed) and leave enough to connect to the binding post. |
![]()
![]()